Have you ever taken what should have been a perfect family photo, only to discover it's tilted? We've all been there. Crooked photos can ruin even the most precious moments - that beautiful sunset at the beach, your child's graduation ceremony, or that rare group photo where everyone is actually smiling. These tilted images can make your photo albums look unprofessional and take away from the special memories you're trying to preserve. Learning how to straighten photo is an essential skill for anyone who takes pictures regularly. The good news is that fixing crooked photos is easier than you might think. In this article, we'll explore three simple methods to straighten your photos and transform those awkward tilted shots into perfectly aligned memories.

- On This Page
- What Is "Straighten Photo"
- Why You Need to Know How to Straighten Photo
- Method 1: How to Straighten Photo Online Free
- Method 2: How to Straighten Photo in Photoshop
- Method 3: How to Straighten Photo on iPhone
- Unleash the Potential of Your Photography with AI
What Is "Straighten Photo"
Photo straightening refers to the process of correcting the alignment of an image that was captured at an angle. Aligning horizontal and vertical lines is what this method does. Then you will get sharper and more appealing photos. It's a simple fix for a big improvement.
Why You Need to Know How to Straighten Photo
Learning how to straighten photo is vital for several reasons that affect the quality of your images.
First, shooting mistakes happen to everyone - even professional photographers sometimes take tilted photos when working quickly or in challenging conditions.
Second, unstable shooting environments like moving vehicles, uneven terrain, or crowded spaces often lead to crooked shots despite your best efforts to hold the camera steady.
Finally, proper alignment is crucial for better composition and aesthetics. Straight horizons and vertical lines make photos look more professional and pleasing to the eye. Our brains naturally expect certain lines to be horizontal or vertical, and when they're not, images can feel uncomfortable to view.
Method 1: How to Straighten Photo Online Free
If you need to quickly fix a tilted image without downloading any software, online tools are perfect for the job. Online photo straightener services are convenient because they work on any device with internet access and require no installation.
One excellent option for straighten photo online free is Canva's Photo Straightener. This user-friendly tool offers precise control while being completely free to use. Here's how to use it:
Step 1: Visit Canva's website, click “Start Editing Your Photos” button to enter edit page. Selecting "Upload files" to upload the image.

Step 2: Once your photo appears in the editor, click on it to select it. Then find the "Rotate" icon on the right side of the photo. Move the photo left or right until your photo looks properly aligned. Once satisfied, download your straightened photo.

Most online photo straightener tools work similarly, with slight variations in their interface. You can choose any platform based on your personal preference - whether you prefer Photopea, BeFunky, or other free online editors, the basic concept remains the same.
Method 2: How to Straighten Photo in Photoshop
For those who need more precise control or regularly edit photos, Adobe Photoshop offers powerful straightening capabilities. How to straighten photo in Photoshop is straightforward once you learn the process:
Step 1: Open your image in Photoshop and select the Crop Tool from the toolbar (or press C on your keyboard).

Step 2: Look for the Straighten button in the options bar at the top of the screen. Click on it, then draw a line along what should be a straight horizontal or vertical element in your photo (like a horizon or building edge).

Step 3: When you release the mouse button, Photoshop automatically rotates the image to make your line perfectly horizontal or vertical. You can then adjust the crop frame and press Enter to apply the changes.

Method 3: How to Straighten Photo on iPhone
For iPhone users who take lots of photos on their devices, there's no need to transfer images to a computer or use online tools. The built-in Photos app includes excellent editing features, including straightening options.
Here's how to straighten photo on iPhone using the native tools:
Step 1: Open the Photos app and select the image you want to straighten. Tap "Edit" in the top-right corner.
Step 2: Tap the crop/rotate icon at the bottom of the screen (it looks like a square with arrows around it).
Step 3: You'll see a dial and a grid appear over your photo. Simply rotate the dial until your image looks straight. The gridlines help you align horizontal and vertical elements. When you're satisfied, tap "Done" to save your changes.

Tip: Always consider making a copy of your original photo before editing. Although the Photos app allows you to revert to the original, having a backup ensures you never lose your original images if something goes wrong during the editing process.
Unleash the Potential of Your Photography with AI
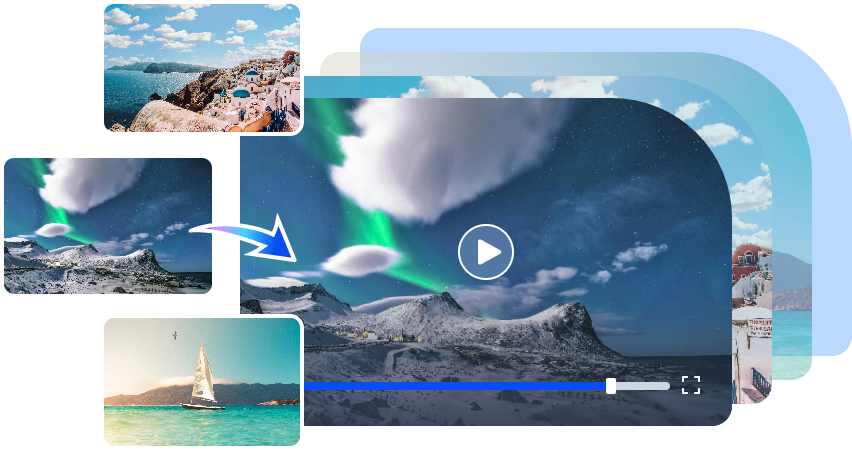
After you've mastered how to straighten photo techniques, use AI tools to transform your aligned images into dynamic content. For example, Vidwud Image to Video is an AI-powered platform tool to add subtle, realistic motion that makes your images more engaging than before. Whether you're creating content for social media, business presentations, or personal memories, this tool opens up new creative possibilities.
Free AI Image to Video Generator
-
Best free online image to video generator
-
Turn any text/image to vivid video with high quality
- Clean and intuitive interface design
Turn Image to Video Now
Vidwud offers several standout features:
-
Easy Operation & Fast Generation: The intuitive interface requires no technical skills, and your videos are ready in minutes. Simply upload your photo, AI will add animations and process all the tasks.
-
Outstanding Conversion Effects: The high-quality animation algorithms create smooth, natural-looking movement that enhances your photos without looking artificial.
- Intelligent Dynamic Element Addition: The AI can identify different elements in your photo and animate them separately, creating a multi-layered effect that brings depth to your images.
- One-Click Sharing to Multiple Platforms: Once your video is created, easily share it to social media platforms directly from the tool, saving you time and effort.
Here's how to use Vidwud to transform your straightened photos:
Step 1: Visit the Vidwud, and click on the "Image to Video" option under the AI Tools Hub.

Step 2: Upload your perfectly straightened photo by clicking the upload button or dragging and dropping your image. Then click “Generate Video”.

Step 3: Wait for a few seconds to preview the result, you can edit, share or download your video creation when satisfied.

If you want to learn even more creative techniques, check out how to animate a picture for additional tips and inspiration.
Conclusion
Mastering how to straighten photo is an essential skill that instantly improves your photography. Whether you choose to use free online tools, professional software like Photoshop, or the convenient built-in features on your iPhone, straightening your images creates more professional and visually appealing results. Take some time to practice these methods, and you'll quickly develop an eye for perfectly aligned photos. Ready to take your photography to the next level? Sign up for Vidwud today and explore more possibilities!
Free AI Image to Video Generator
-
Best free online image to video generator
-
Turn any text/image to vivid video with high quality
- Clean and intuitive interface design
Turn Image to Video Now